PERSONALIZED WOODEN HANGERS: DIY IDEAS FOR 7 DIFFERENT WEDDING STYLES!
Wedding planning is always overwhelming for all parties involved, but most of all, for the bride. And no bride wants to miss out on something seemingly unimportant only to realize on her wedding day, with a shudder, that she should have probably thought about the same earlier!
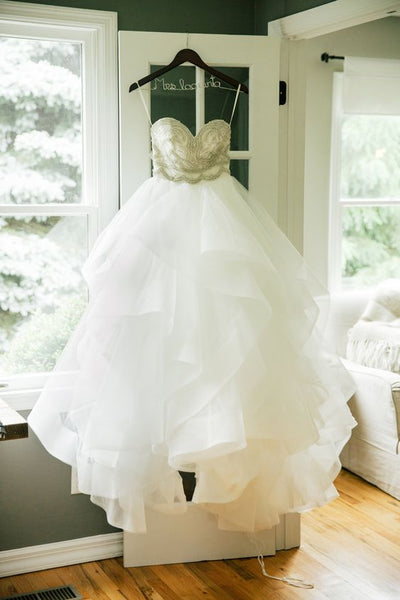
Case in point: Wedding day clothes hangers!
These don't come to mind when you think about weddings, but you realize their part in your big day when it's time to click pictures of your wedding dress.
Now that you see what we're talking about, don't fret about it just yet. We've got you covered with some splendid DIY wooden hangers decor ideas for 7 different wedding styles!
Read on and take your pick!
SHABBY CHIC
Romantic, soft, and feminine- there's no going wrong with a wedding that's styled shabby chic! Add to the splendour with these distressed hangers that can be easily dressed up with flowers, ribbons, or printed tags.
What You Need
- Fine and medium grade sandpaper
- Lint-free cloths or soft rags
- Flat or satin finish paint in one or two colors
- Paint brush
Steps
- Sand down the hanger using the fine grade sandpaper. Be gentle; you only want to roughen up the surface a bit so the paint will adhere to it.
- Wipe down the hanger using the lint-free cloth or a damp rag. If using a damp cloth, allow the hanger to dry completely before proceeding.
- Paint a light coat over the hanger carefully. If you're using just one color, you might need to do two coats. If using two colors, paint one coat of the darker color, followed by one coat of the lighter color.
- Remember to let the hanger dry completely before painting on more coats. Also, sand the surface lightly and wipe clean between coats.
- Once completely dry, go over the hanger surfaces, especially edges, with the medium grade sandpaper to give it a distressed look. You can also use steel wool for this.
- Wipe clean before adding bows or embellishments.
- Tip: For a stunning effect, use a dark stain on your hanger and then coat with white paint before distressing!

VINTAGE
A vintage wedding can never go out of fashion. Whether you want to capture the free-spirited vibe of the 70s or the unmatched glamour of the 20s, it's surely going to be an affair to remember!
Here's a stunning idea for the couple's wedding wooden hangers.
What You Need
- Black and white paint
- Paint brushes
- Black satin ribbon
- Floral/pearl embellishments
- Glue
Steps
- Paint one hanger with the white paint and allow to dry. Instead of giving the hanger a thick coat of paint, do 2-3 light coats.
- Paint a 'V' on the middle of the second hanger using white paint- see image for reference. Again, give it 2-3 light coats and allow to dry.
- Paint the rest of the second hanger black, using 1-2 thin coats.
- Add two black vertical dots on the portion painted in white. Allow to dry completely.
- Cut about 6 inches of the black ribbon and glue the ends together. Cut another bit from the ribbon to make a small loop that can cinch the other at the middle. Glue in place to form a bow. Once dry, attach to the black hanger.
- Attach floral/pearl embellishments to the white hanger using glue and allow to dry.
Tip: As discussed in the previous idea, you might want to sand down your hangers before you begin painting them.

WINTER
If you're planning to have a magical winter wedding, what better way to add some charm with a touch of gold? Check out this glitter wooden hangers decor idea.
What You Need
- Gold glitter
- Craft glue, like Mod Podge
- Brush
Steps
- Using the brush, paint one side of the hanger with the glue.
- Sprinkle the glitter all over the hanger liberally.
- Once dry, tap off excess glitter.
- Repeat on the other side of the hanger and along the edges.
Note: Glitter tends to shed and you certainly don't want to deal with that on your wedding day. Secure glitter in place by finishing off with a sealant spray. You can also mix glue, water and glitter in equal amounts and paint this mixture over the hanger.
Tip: If using Mod Podge, opt for a satin or gloss finish over matte for more shine!

SUMMER/SPRING
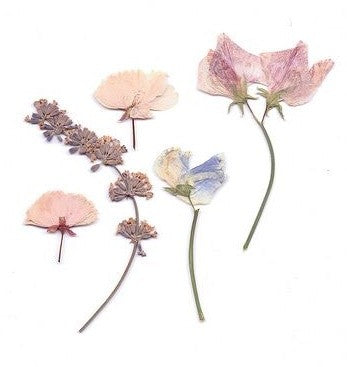
Welcome the sun with this lovely floral hanger idea! You can use a variety of flowers to deck up your bridal wooden hangers to match just about any summer or spring color palette!
What You Need
- Pressed flowers
- Epoxy resin
- Wooden stick
- Needle
- Wax papers
Steps
- Place hangers flat on wax paper.
- Arrange pressed flowers on the hanger.
- Prepare resin according to the instructions on the packaging.
- Pour resin over the pressed flowers and hanger. Alternatively, dribble it neatly onto the flowers using the wooden stick.
- Use the needle to move around flowers in place, if need be.
- Resin can build up around the base, so transfer hangers to a clean wax sheet after about 10 minutes. You might have to repeat this step again.
- Allow to cure for 24-72 hours.
Tip: Pressed flowers can be made easily by placing fresh flowers between sheets of wax paper and allowing them to sit flat under heavy books for about 4-6 weeks.

ALL WHITE
An all white wedding is nothing short of romantic and dreamy. Add to the decor with this amazing wooden hangers idea!
What You Need
- Lace fabric-choose a pattern that is small and can be repeated, but not with holes too small for the pattern not to show through
- Tape or heavy objects
- Spray paint
Steps
- Cut out a portion of the lace fabric such that it covers one side of the hanger completely.
- Lay the hanger flat on a surface and the fabric on top of it. Secure the fabric to the sides of the hanger or to the surface using tape. If you've got excess fabric, you can simply place heavy objects on the edges so that it doesn't move, giving you a clear design.
- Spray paint over the lace and let dry for a while. While still a bit wet, remove the fabric gently so as to not ruin the design. Allow to dry completely.
- Repeat on the other side of the hanger.
Tip: Embellish with a white or silver bow, or pearls!

RUSTIC
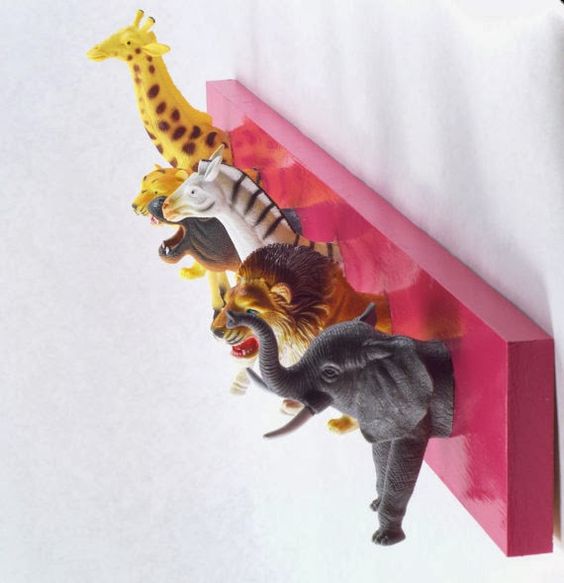
Whether you have a barn wedding or exchange vows in the great outdoors, a rustic wedding is sure to be a wondrous affair. Take a look at this funky idea that's sure to delight the couple and the bridal party!
What You Need
- Plastic animals toy set
- Dremel tool or hobby knife
- Glue
- Spray paint
Steps
- Use the Dremel tool or hobby knife to cut off the heads of the plastic animals. You might want to cut them in half along the waist depending on their size.
- Position one animal head each on the middle of the hangers. Glue them in place and allow to dry.
- Spray paint the hanger and animal heads in a neutral color like white or brown. You can also go for black or gold spray paint in keeping with the rustic decor.
Tip: If you want to show off your wooden hangers, consider spray painting the animals first and then gluing them onto the hangers. Tie on a burlap bow for added rustic appeal!

BEACH
Ah, beach weddings! With the sparkling sand, fresh ocean air, and the soothing sound of waves, you can't dream of a better backdrop for a day as important as your wedding.
Let your wedding hanger speak volumes about your love for the sea with this DIY idea.
What You Need
- Starfish
- A mix of shells
- Ribbon
- Scissors
- Strong glue
Steps
- Arrange starfish and shells on the hanger and move them around till you are sure about the arrangement. Once you are satisfied, glue them onto the hanger and allow to dry.
- Depending on how long you want the tails to be, cut a length of ribbon. Form loops toward both ends and tie the ribbon around the neck of the hanger. You can also form a bow and simply secure it to the hanger using glue.
Tip: Use a nautical ribbon-striped navy blue and white-for added effect!

CONCLUSION
With this all-inclusive list of wedding themes and styles, together with a DIY personalized hanger decor idea to match, you're all set to have the wedding of your dreams. So get started on the planning right away and add extra glam to your big day with the tips in this post!

